The Best Way to Handle Roof Leaks Around Dormer Windows in Older Cheviot Homes
Dormer window leaks are a common headache for Cheviot homeowners with older Cape Cod and Colonial-style houses. Water stains on your ceiling near dormers usually mean flashing failures at the roof-to-wall transition. In Cheviot’s older neighborhoods like the area near North Bend Road and the Cheviot Recreation Center, many homes built in the 1940s-1960s have aging dormer assemblies that weren’t designed for today’s heavier spring storms and freeze-thaw cycles.
The first step is identifying the leak source. Most dormer leaks come from failed step flashing, cracked caulk around window casings, or deteriorated apron flashing at the dormer’s base. Water often travels along rafters before dripping onto your ceiling, so the stain location rarely matches the actual entry point. A simple garden hose test can help pinpoint the problem area before calling a professional.
Cheviot’s location in the Ohio River Valley means your roof faces unique challenges. The area’s clay-heavy soil causes foundation settling that can stress roof structures over time. Combined with Hamilton County’s annual rainfall averaging 42 inches and frequent freeze-thaw cycles, dormer joints become vulnerable to separation and water intrusion. Local building codes now require ice and water shield installation in these transition areas for new work. EPA mold information.
DIY inspection from the ground can reveal missing or lifted shingles near dormers, but never walk on an older roof yourself. Look for rusted flashing, separated caulk joints, or moss growth indicating moisture retention. If you spot these warning signs, it’s time to call a Cincinnati roofer familiar with Cheviot’s specific housing stock and weather patterns. How to Get Your Cincinnati Roof Replaced After a Major Hail Storm.
Professional repair typically involves removing surrounding shingles, replacing all flashing components with new code-compliant materials, and installing a waterproof underlayment barrier. The process takes 1-2 days for most dormer repairs and costs between $800-$2,500 depending on accessibility and damage extent. Always verify your contractor pulls the required Hamilton County building permit for structural repairs. Reliable Flat Roof Repair Services for Over-the-Rhine Business Owners.
Don’t wait until the next heavy rain to address dormer leaks. Call (513) 223-5511 today to schedule your inspection and protect your Cheviot home from costly water damage.
Common Symptoms of Dormer Leaks
Water stains on ceilings near dormer windows are the most obvious sign of a leak. You might also notice damp spots in your attic, peeling paint around window trim, or musty odors indicating moisture buildup. In Cheviot’s older homes, these symptoms often appear during spring storms or after winter thaws when ice dams form at dormer valleys.
Another telltale sign is water dripping from light fixtures or smoke detectors located near dormers. This happens when water travels along ceiling joists before finding a path downward. You might also see discoloration or bubbling on interior walls adjacent to dormer windows, especially in homes with plaster walls common in Cheviot’s 1950s construction.
During heavy rains, you may hear dripping sounds in your attic or notice daylight visible through roof boards near dormer junctions. These visual and auditory clues help pinpoint leak locations before professional inspection. Pay attention to when leaks occur – if they only happen during wind-driven rain, the problem is likely flashing-related rather than a general roof failure.
Exterior signs include missing or damaged shingles around dormers, rusted or bent flashing, and separated caulk joints. From the ground, you might spot algae or moss growth on north-facing dormer roofs, indicating persistent moisture issues that need addressing before they cause interior damage.
Why Dormers Leak: The 4 Main Culprits
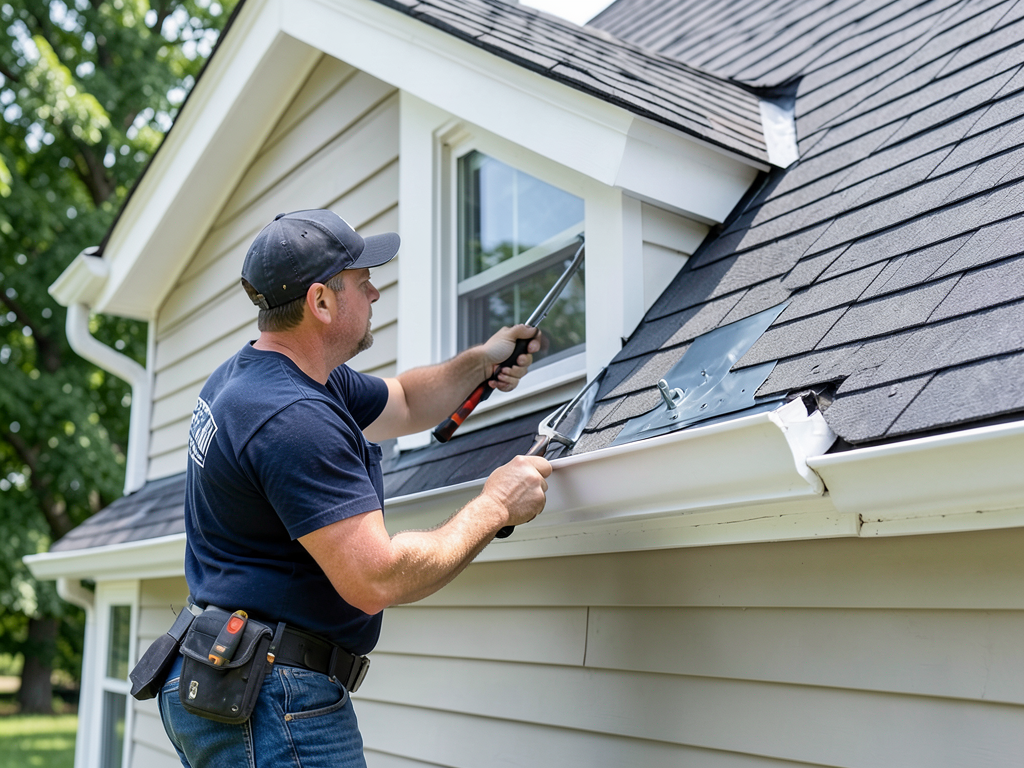
Step flashing failure is the primary cause of dormer leaks in Cheviot homes. These L-shaped metal pieces channel water down the roof surface, but they corrode, separate, or get installed incorrectly over time. In older homes, step flashing was often just nailed to the roof deck without proper integration with the wall siding, creating direct water entry points. Is Metal Roofing Worth the Investment for Your Anderson Township Home?.
Window casing deterioration allows water to seep behind trim and into wall cavities. Cheviot’s older homes often have wooden window casings that shrink, crack, or rot over decades of exposure. Once water penetrates these joints, it travels behind siding and into your home’s interior structure, causing damage that’s not immediately visible.
Apron flashing at the dormer’s base can fail when the seal between the flashing and roof surface breaks down. This horizontal flashing piece directs water away from the dormer wall, but UV exposure, temperature changes, and physical damage create gaps where water can enter. In Cheviot’s climate, these failures often occur after severe storms or heavy snow loads.
Siding-to-roof transition problems occur when J-channel or other siding accessories aren’t properly integrated with roofing materials. Water running down the wall surface needs a clear path to drain over the roof rather than behind it. Missing or damaged kick-out flashing at these transitions is a common issue in Cheviot’s older housing stock.. Read more about Why your Evendale home needs extra-strength flashing around the chimney.
The Cincinnati Factor: Weather and Your Roof
Cincinnati’s climate creates unique challenges for dormer waterproofing. The region experiences 42 inches of annual rainfall, concentrated in spring and summer thunderstorms that test roof assemblies. Wind-driven rain can force water under improperly sealed flashing, while the area’s humidity levels above 70% during summer months promote moisture retention in vulnerable areas.
Freeze-thaw cycles are particularly damaging to dormer flashing. When temperatures fluctuate around 32°F, water trapped in small gaps expands as it freezes, gradually widening openings. This process, called ice wedging, can split metal flashing and separate caulk joints within a single winter season. Cheviot’s older homes, built before modern ice and water shield requirements, are especially vulnerable.
Ohio’s building codes now mandate ice barrier installation extending at least 24 inches past the exterior wall line in dormer areas (Ohio Residential Code R905.1.2). This underlayment provides critical protection against ice damming, which occurs when melting snow refreezes at roof edges, forcing water under shingles and flashing. Many Cheviot homes lack this protection due to their age. Ohio Residential Code.
Summer heat also takes a toll on dormer assemblies. Dark shingles can reach temperatures above 150°F, causing expansion and contraction that stresses flashing connections. The thermal cycling accelerates material fatigue, particularly in older metal flashing that’s lost its protective coatings. UV exposure degrades rubber seals and caulk, creating new leak paths each season.
DIY Inspection vs. Professional Repair
Homeowners can perform basic dormer inspections from the ground using binoculars to check for obvious damage. Look for missing or curled shingles, rusted flashing, separated caulk joints, and sagging roof areas near dormers. Check your attic during daylight hours for light penetration around dormer junctions, which indicates gaps in the roof assembly.
However, never walk on an older roof yourself. Cheviot’s 1940s-1960s homes often have weaker roof decks that can’t support foot traffic safely. Walking on aged shingles can also cause immediate damage, creating new leak paths. Professional roofers use safety equipment and know how to distribute weight properly on older structures.
A professional inspection includes moisture meter readings to detect hidden water intrusion, thermal imaging to identify temperature variations indicating moisture, and detailed examination of flashing integration with wall siding. They’ll also check for proper attic ventilation, which affects how moisture moves through your roof assembly during temperature changes.
Professionals can perform a controlled water test to isolate leak sources. This involves systematically spraying water on specific areas while someone monitors the interior for signs of intrusion. This diagnostic approach is especially valuable for intermittent leaks that only appear during certain weather conditions.
DIY repairs often fail because they address symptoms rather than causes. Patching a visible leak without fixing the underlying flashing failure means the problem will return, usually worse. Professional repairs include proper code-compliant flashing installation, appropriate underlayment, and integration with existing roofing materials for lasting protection.
Our Dormer Repair Process
Professional dormer leak repair starts with complete removal of surrounding shingles to access all flashing components. This allows inspection of the roof deck for rot or damage that needs addressing before new materials are installed. In Cheviot’s older homes, we often find deteriorated sheathing that requires replacement to ensure a solid foundation for repairs.
Next, we remove all old flashing, including step flashing, apron flashing, and any counter-flashing. Each piece is inspected to understand the original installation method and identify any code violations or improper techniques that contributed to the failure. This diagnostic step helps prevent repeat problems.
New code-compliant flashing is then installed according to current Ohio Residential Code requirements. This includes proper step flashing integration with wall siding, kick-out flashing at transition points, and ice and water shield installation in dormer valleys. We use galvanized steel or copper flashing depending on your roof’s existing materials and budget considerations.
The repair process includes installing new underlayment extending at least 24 inches past the exterior wall line, as required by current building codes. This ice and water shield provides critical protection against the freeze-thaw cycles common in Cheviot’s climate. We also seal all window casing joints with high-quality exterior caulk designed for temperature extremes.
Finally, new matching shingles are installed, and the entire area is inspected for proper water shedding. We test the repair with controlled water application to verify the fix before considering the job complete. Most dormer repairs in Cheviot take 1-2 days, depending on weather conditions and repair complexity.
Estimated Costs and Timelines in Cincinnati
Dormer leak repairs in Cincinnati typically range from $800 to $2,500, with most falling between $1,200 and $1,800. The wide range reflects differences in damage extent, dormer size, roof accessibility, and whether structural repairs are needed. Simple flashing replacement on an accessible dormer might cost $800, while repairs requiring deck replacement or extensive water damage mitigation can exceed $2,500.
Timeline expectations vary by season and contractor availability. During spring storm season, emergency repairs might be completed within 24-48 hours if the damage is severe. Routine repairs scheduled during slower periods typically take 1-2 weeks from initial inspection to completion. Weather always affects outdoor roofing work – we avoid working in heavy rain or when temperatures drop below 40°F for proper material adhesion. Who to Call for 24-Hour Emergency Roof Leak Repair in Cincinnati.
Permit requirements add to both cost and timeline. Hamilton County requires building permits for structural repairs, including most dormer work. Permit fees range from $75 to $200 depending on repair scope, and the approval process takes 2-3 business days. Always verify your contractor pulls the required permit – this protects you from liability and ensures code-compliant work.
Insurance coverage for dormer leaks varies by cause. Damage from sudden events like storms is often covered, while gradual deterioration from age or maintenance issues typically isn’t. Your homeowner’s policy may cover repair costs minus your deductible, but you’ll need documentation of the damage and repair process for claims approval.
Preventative maintenance costs less than emergency repairs. Annual inspections to check flashing condition, clean gutters, and address minor issues before they become major problems typically cost $150-$300. This investment often prevents the $1,000+ repairs that result from neglected maintenance in Cincinnati’s challenging climate. Emergency Tarping Service.
Frequently Asked Questions
How can I tell if my dormer leak is serious?
Serious dormer leaks show multiple water stains, active dripping during rain, or visible ceiling sagging. If you notice water spots spreading across ceilings or walls, or if leaks occur during every rainfall, the problem needs immediate professional attention to prevent structural damage.
Can I repair a dormer leak myself?
DIY dormer repairs often fail because they don’t address the root cause. While you can perform basic inspections from the ground, actual repairs require proper flashing installation, code compliance, and safety equipment. Improper repairs can void warranties and create bigger problems.
How long do dormer repairs typically last?
Quality dormer repairs using code-compliant materials and proper installation techniques should last 15-20 years. The longevity depends on material quality, installation expertise, and ongoing maintenance. Repairs in Cheviot’s climate may need earlier attention due to severe weather exposure.
Will my homeowner’s insurance cover dormer leak repairs?
Insurance typically covers sudden damage from covered perils like storms, but not gradual deterioration from age or maintenance issues. Check your policy details and document damage thoroughly if filing a claim. Some policies require professional inspections for claim approval.
How soon should I address a dormer leak?
Address dormer leaks immediately upon discovery. Even small leaks can cause extensive damage to insulation, ceiling materials, and structural components within weeks. Water damage also promotes mold growth, which poses health risks and increases repair costs significantly.
You may also find this helpful. Why the box gutters on your Lockland home are leaking into your walls.
You may also find this helpful. How to handle a leaking roof on a shotgun style home in Camp Washington.
{
“@context”: “https://schema.org”,
“@type”: “BlogPosting”,
“headline”: “The Best Way to Handle Roof Leaks Around Dormer Windows in Older Cheviot Homes”,
“description”: “Learn how to diagnose and repair dormer window roof leaks in Cheviot’s older homes. Get expert tips on flashing, weatherproofing, and local building codes.”,
“wordCount”: 2097,
“datePublished”: “2026-05-11T10:09:00.000Z”,
“dateModified”: “2026-05-11T10:09:00.000Z”,
“inLanguage”: “en-US”,
“mainEntityOfPage”: {
“@type”: “WebPage”,
“@id”: “https://firstchoiceroofingcincinnati.com”
},
“publisher”: {
“@type”: “LocalBusiness”,
“name”: “First Choice Roofing Cincinnati”,
“url”: “https://firstchoiceroofingcincinnati.com”
},
“author”: {
“@type”: “Organization”,
“name”: “First Choice Roofing Cincinnati”,
“url”: “https://firstchoiceroofingcincinnati.com”
},
“image”: {
“@type”: “ImageObject”,
“url”: “https://firstchoiceroofingcincinnati.com/wp-content/uploads/2026/03/the-best-way-to-handle-roof-leaks-around-dormer-wi-1.png”
}
}
{
“@context”: “https://schema.org”,
“@type”: “RoofingContractor”,
“name”: “First Choice Roofing Cincinnati”,
“url”: “https://firstchoiceroofingcincinnati.com”,
“address”: {
“@type”: “PostalAddress”,
“addressLocality”: “Cincinnati”
},
“areaServed”: {
“@type”: “City”,
“name”: “Cincinnati”
}
}
{
“@context”: “https://schema.org”,
“@type”: “FAQPage”,
“mainEntity”: [
{
“@type”: “Question”,
“name”: “How can I tell if my dormer leak is serious?”,
“acceptedAnswer”: {
“@type”: “Answer”,
“text”: “Serious dormer leaks show multiple water stains, active dripping during rain, or visible ceiling sagging. If you notice water spots spreading across ceilings or walls, or if leaks occur during every rainfall, the problem needs immediate professional attention to prevent structural damage.”
}
},
{
“@type”: “Question”,
“name”: “Can I repair a dormer leak myself?”,
“acceptedAnswer”: {
“@type”: “Answer”,
“text”: “DIY dormer repairs often fail because they don’t address the root cause. While you can perform basic inspections from the ground, actual repairs require proper flashing installation, code compliance, and safety equipment. Improper repairs can void warranties and create bigger problems.”
}
},
{
“@type”: “Question”,
“name”: “How long do dormer repairs typically last?”,
“acceptedAnswer”: {
“@type”: “Answer”,
“text”: “Quality dormer repairs using code-compliant materials and proper installation techniques should last 15-20 years. The longevity depends on material quality, installation expertise, and ongoing maintenance. Repairs in Cheviot’s climate may need earlier attention due to severe weather exposure.”
}
},
{
“@type”: “Question”,
“name”: “Will my homeowner’s insurance cover dormer leak repairs?”,
“acceptedAnswer”: {
“@type”: “Answer”,
“text”: “Insurance typically covers sudden damage from covered perils like storms, but not gradual deterioration from age or maintenance issues. Check your policy details and document damage thoroughly if filing a claim. Some policies require professional inspections for claim approval.”
}
},
{
“@type”: “Question”,
“name”: “How soon should I address a dormer leak?”,
“acceptedAnswer”: {
“@type”: “Answer”,
“text”: “Address dormer leaks immediately upon discovery. Even small leaks can cause extensive damage to insulation, ceiling materials, and structural components within weeks. Water damage also promotes mold growth, which poses health risks and increases repair costs significantly.”
}
}
]
}
{
“@context”: “https://schema.org”,
“@type”: “BreadcrumbList”,
“itemListElement”: [
{
“@type”: “ListItem”,
“position”: 1,
“name”: “Home”,
“item”: “https://firstchoiceroofingcincinnati.com”
},
{
“@type”: “ListItem”,
“position”: 2,
“name”: “Blog”,
“item”: “https://firstchoiceroofingcincinnati.com/blog”
},
{
“@type”: “ListItem”,
“position”: 3,
“name”: “The Best Way to Handle Roof Leaks Around Dormer Windows in Older Cheviot Homes”
}
]
}
{
“@context”: “https://schema.org”,
“@type”: “Service”,
“serviceType”: “Roofing”,
“provider”: {
“@type”: “LocalBusiness”,
“name”: “First Choice Roofing Cincinnati”,
“url”: “https://firstchoiceroofingcincinnati.com”
},
“areaServed”: {
“@type”: “City”,
“name”: “Cincinnati”
},
“description”: “Learn how to diagnose and repair dormer window roof leaks in Cheviot’s older homes. Get expert tips on flashing, weatherproofing, and local building codes.”
}